Outlook
XP Setup
1) Open Outlook XP
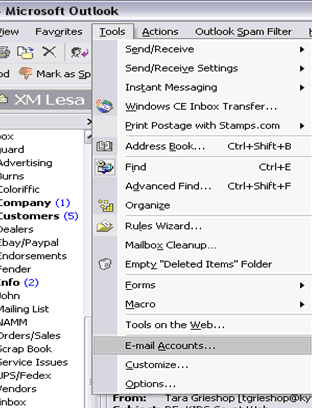
2) From the drop-down menus, select Tools>E-Mail Accounts
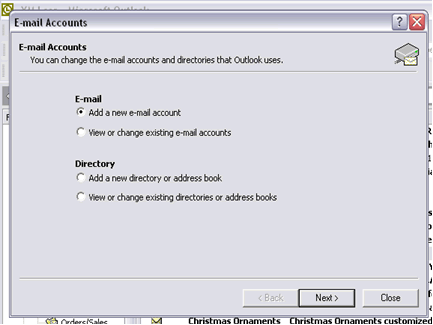
3) Select Add a new e-mail account from the
box that opens. Click NEXT.
4) In the Server Type box select POP3
as noted below. Click NEXT.

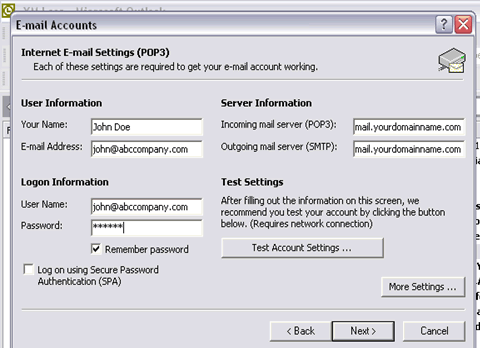
5) In the Internet E-Mail Settings (POP3) box fill in fields as noted below:
Your Name - Enter your name
E-Mail Address - Enter your e-mail address
Incoming mail server - mail.yourdomainname.com (Replace yourdomainname.com
with your actual domain name - Ex. mail.abccompany.com)
Outgoing mail server - same as incoming mail server
User Name - Enter your e-mail address
Password - Enter your assigned password
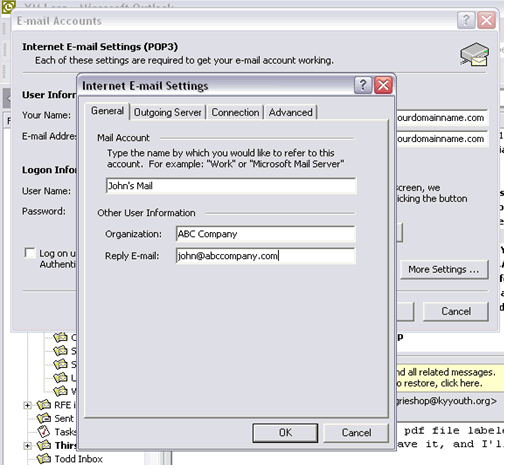
6) Click More Settings, which
will open a new box. Click on the General tab and fill in a reference name
for your mail account (can be anything), the name of your company, if applicable,
and your e-mail address.
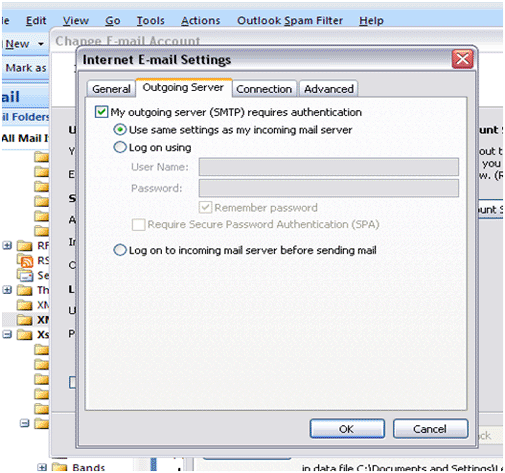
7) Click on the Outgoing Server Tab and check the box at the top that
says
"My Outgoing Server (SMTP) required authentication. A green circle should
appear next to the following line that says Use the Same settings as
my
incoming mail server.
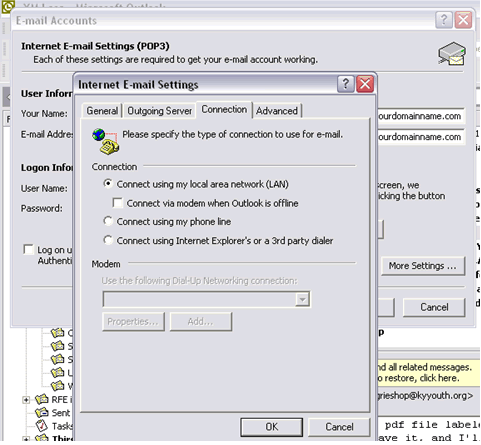
8) Click on the Connection Tab and select
your type of internet connection. If you have dial-up, select Connect
using my phone line. If you are on a Network (LAN), then select Connect
using my local area network (LAN) as noted below.
9) Click OK
10) Click Test Account Settings to have Outlook test
the settings you just entered. If there is a problem, it will tell you
what it is.
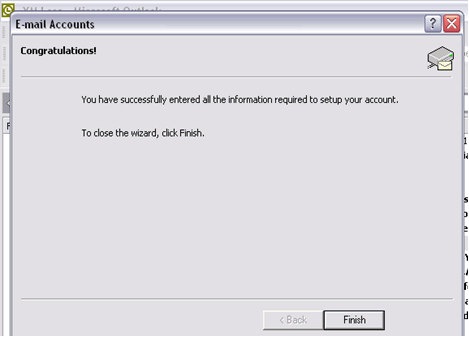
11) Then Click NEXT.
12) That's it. You are finished.
You are now ready to send and receive email
using Outlook XP.
|